Step by Step Guide to Recondition a Car Battery
Whether your car has an internal combustion engine, is a hybrid, or is electric, all cars need a battery. If you own a car, you already know this, but the battery is also one of the many things in our vehicle which we fail to take care of until the car eventually refuses to start.
Vehicles with an internal combustion engine rely on standard flooded lead-acid batteries, which are 12-volt black boxes. Hybrid engines differentiate themselves by adding a larger nickel-metal hydride (NiMH) or a lithium-ion (Li-ion) battery to power a small electric motor which helps an ICE engine improve its fuel economy. Then we have another one, which is our plug-in hybrid and electric vehicles. They are typically equipped with decent-sized Li-ion battery packs to offer pure electric driving range.
Coming back to the dilemma of how to revive a dead battery, for this article, we’re talking about the 12-volt lead-acid batteries and what you should do when one goes slow. The initial idea that pops up is to jumpstart or recharge the battery. However, with traditional batteries, it’s also easy (but possibly costly) to visit a local automotive parts store to repair it or visit a big-box retailer to purchase a suitable replacement. But here lies the secret and the inspiration for this article. What if you could recharge a battery to full strength instead of replacing it every time it died? Sounds too good to be true, right? And what if you could do so several times? So let’s step up a gear and dive right in.
What is Battery Reconditioning?
When powering a vehicle, a battery discharge process known as sulfation occurs. This chemical reaction results in the formation of sulfate crystals on the battery plates – specifically on the negative scale. More crystals mean longer charge times, less efficiency, and lower charge capacity. When a battery is reconditioned or renewed, it cleans these sulfates, replenishing the internal electrolyte solution and allowing the battery to recharge and function like new.
Step-by-Step Guide to Reconditioning a Battery
STEP 1: Examine the Battery
Before beginning, the first thing you should try is to carry out tests to know if the battery responds appropriately to the reconditioning process. Not every battery can be restored, and making efforts on something that will not yield any result is not the ideal start to reconditioning.
The battery should read a minimum of 12 volts to function desirably. If it reads 10 to 12 volts, you may be able to restore normal function with an overhaul. However, there’s no reason to try to fix it if the battery drops below 10 volts even though you’ve only recently changed it. At this point, you should focus your attention and efforts on finding a replacement.
If you’re curious about how a car battery is tested, this is easy to remember as the machine’s name to try literally “a car battery tester.” This approach provides more accurate results than other methods.
STEP 2: Prepare Electrolyte Solution
Replace the electrolyte solution in the battery. Before proceeding further, it is helpful and recommended to prepare this solution to be ready to use as soon as needed.
Firstly, Heat up half a liter of distilled water and make sure it reaches 150 degrees Fahrenheit. This step is essential to dissolve seven to eight ounces of Epsom salt In this hot water. Put your solution aside until you need it.
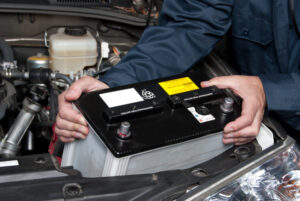
STEP 3: Remove the Battery Cell Covers
First and foremost, now comes the critical part, and essential things usually require some form of safety. Here, safety comes first. Be sure to wear protective equipment such as gloves and safety goggles. You don’t want to have some sprinkle of battery acid all over you. Now, remove the battery cell covers for quick access to the battery.
If you’re working with a sealed battery, you will need to locate the shadow plugs instead. To give you an idea of what it is, they are utilized for covering the openings of the battery cells and must be carefully drilled. (Make sure you do not have a GEL or AGM battery and closely follow the car battery manufacturer’s instructions).
STEP 4: Replace Solution for the Battery
To do this, firstly, drain the existing fluid from the battery. For this, grab a container to pour the solution. And make sure you did an excellent job of disposing of this property.
And now, this is where the solution you made at the start comes to play. Once emptied, fill the battery up with your Epsom saltwater solution. To do this neatly and without spillage, make use of a small plastic funnel and fill each cell wholly and carefully.
STEP 5: Charge the battery
Finally, after all the work has been put out, install the battery covers again or just put some plastic plugs in the holes you made. You can give the battery a gentle shake to ensure all the solution is evenly distributed.
You are charging your battery with a slow charger before trying out the storm or reinstalling it into your car.
Let it charge for at least 24 hours as an extra tip on the side.
The lifespan of a refurbished battery depends on its age and capacity. In theory, you should be able to repeat this process more than a few times. It means an increase in your battery’s lifespan beyond the typical three to five years by quite a considerable amount. It is an easy way to save some of your hard-earned cash.